Thanks to Hannah for entering such a great idea!
Step Number One: for me is always the drawing stage!
Once you have completed a satisfactory drawing to work from then your whole task will be made easier. You can refer to is often, especially when putting eyes or a face on a sculpture. I like to do several ideas and see what will work best for an earring. It is always best to be as small and compact as possible when making earrings; for this reason, I chose to do my drawing at the top. However, the longer design would be suitable for something bigger such as a necklace pendant!
Step 2: Preparing the polymer clay
For the platypus I decided to choose two colors of polymer clay. One lighter golden brown, and a dark brown, then the only other color needed will be the black for eyes. Keeping it simple will make it easier to replicate the design over and over, and this is good for making multiples of your designs to sell.
Once you have the colors of clay chosen and the amounts set out you begin by kneading the polymer clay until it is soft and pliable, pictures of this can be seen in my previous blog post on how-to make "Koala Bear Earrings". Anytime you are working with polymer clay you will need to work it until it is soft or it will tend to be crumbly and not hold shape during the sculpting process. Another thing to remember is to clean your hands between colors so you don't mix, no one wants flecks of any other color in their white.
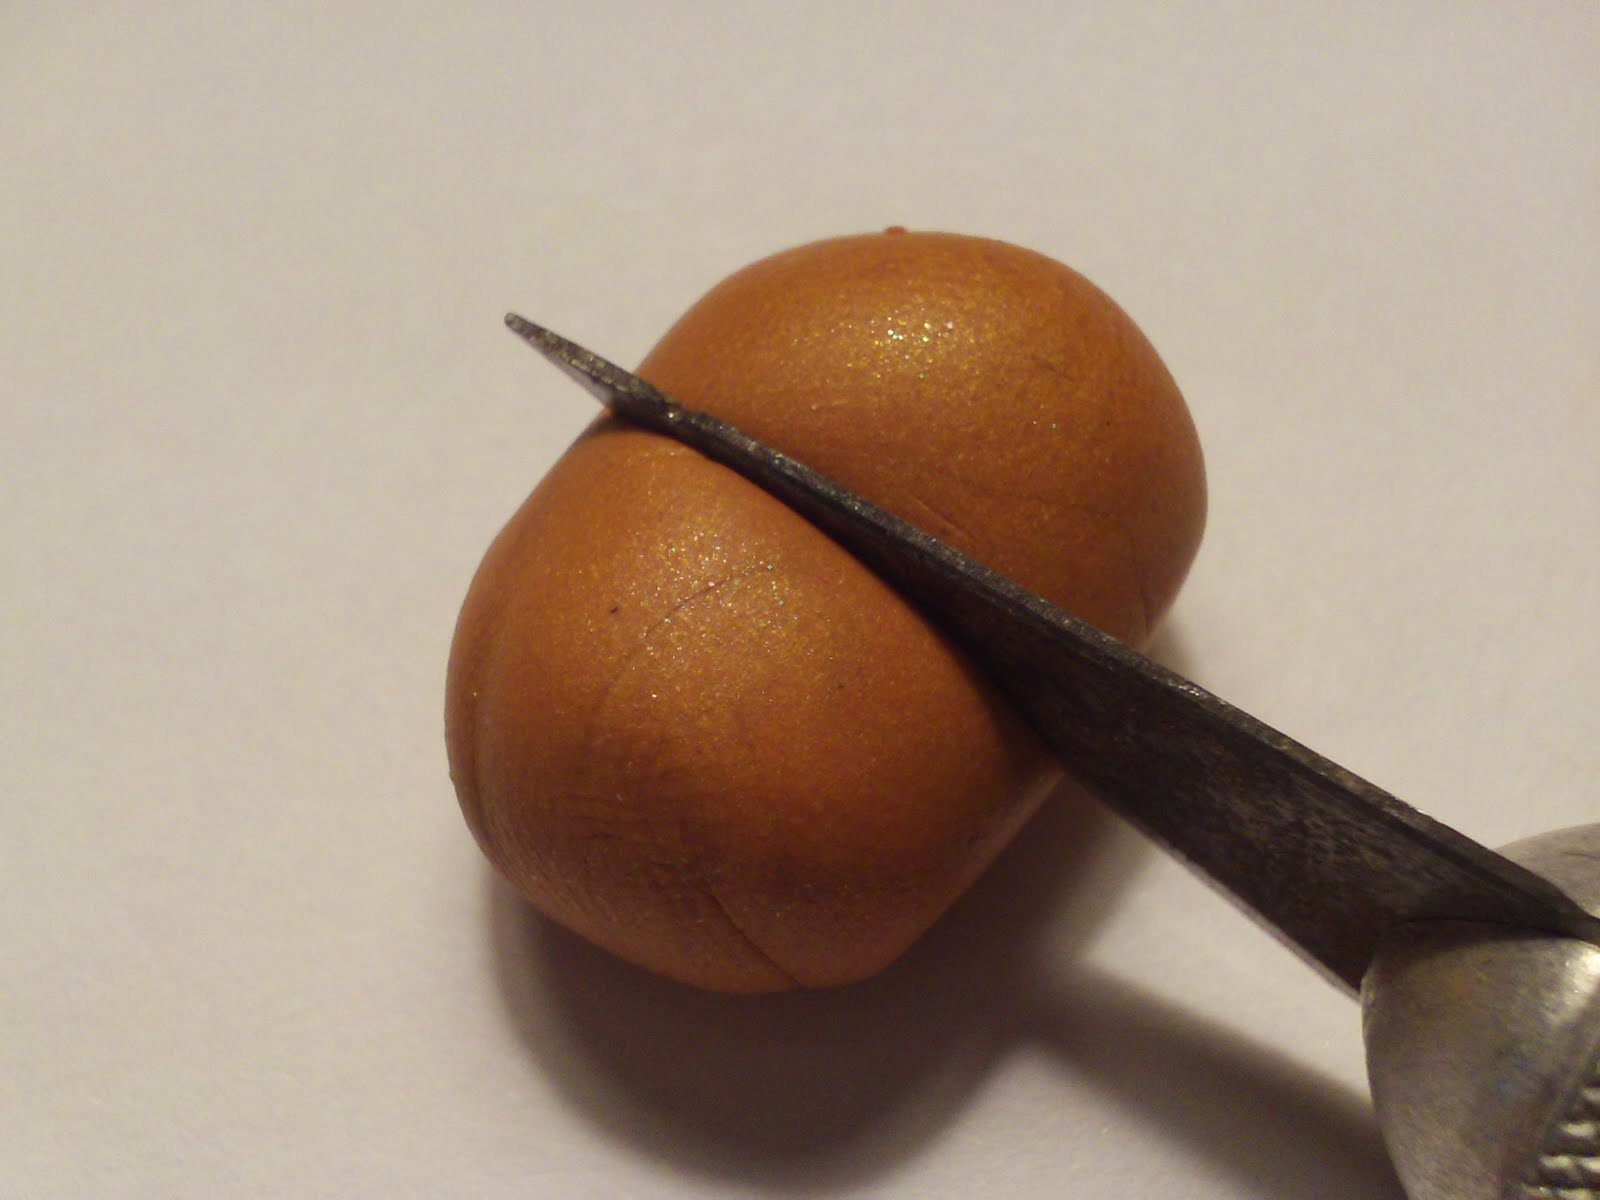
First I have taken the amount of golden brown i want to use for both earrings and cut it in two evenly.
After I cut the entire amount in two i then cut those pieces again but not quite evenly; leave one side a tiny bit bigger than the other. The slightly smaller side will be the head, and the reason it is almost as big as the body is because that will make it cuter! Now you have 4 balls of golden brown as seen below.
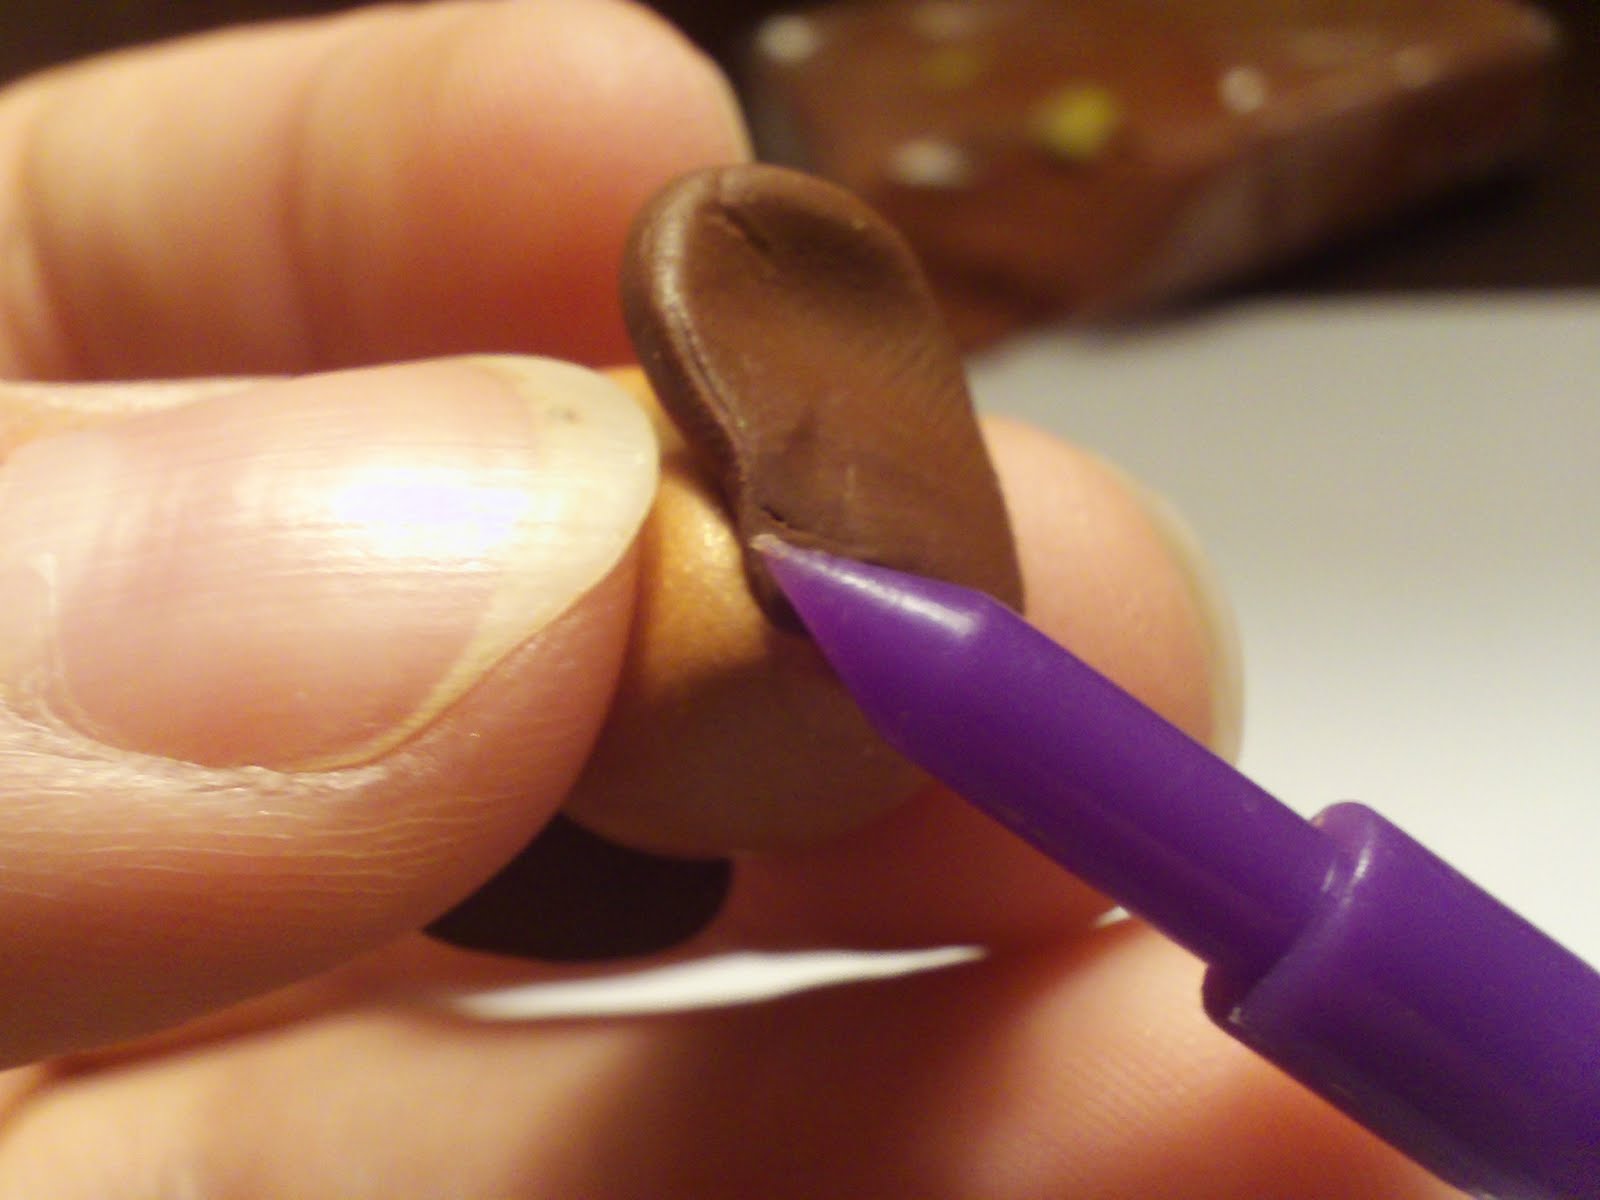
The next stage in the preparation step is to take the dark brown and divide it up into 4 parts. These will be for the beaks, tails, and feet. The beak and feet are one piece and the tail is one on its own. 2 pieces of dark brown per earring. Remember to do everything in two's so you can keep the sizes and designs of the earrings consistent. The pictures below demonstrate how to cut out the beak shape from one of the rolled out pieces of dark brown.
Step 3: Putting the Pieces Together
Begin by putting the beak shape on the face while shaping it into the shape you desire. This piece should be smaller and fatter near where it connects to the face and get wider as it goes out. Once you have the beak on both platypus heads, you can begin to shape the body and attach it to the platypus head. When you shape the body try to make it more elongated than the round ball of the head.
Once the head is attached you can begin to smooth it onto the body thoroughly. Using a tool like the one shown in the picture.
After you have completed smoothing the body to the platypus head then you can take the extra two dark brown pieces of rolled out clay and shape them into a tail like the one in the picture below. Then you use the same smoothing tool to smooth the platypus tail onto the back and bottom of his body, leaving the top of its tail separate but only slightly.
Once the platypus tail is attached you should have something that resembles the picture above. A platypus with his tail head and beak attached! You're on your way to having a complete set of earrings.
Step 4: Details and Extras
Now that you have the main parts of your platypus earrings complete the only things left will be to attach his feet and add eyes, nose holes, and any other smoothing and details. As seen above you make two tiny holes at the end of his nose either with a pointy tool or as I like to use a needle. I use a sewing needle for hole that need to be very tiny and I also use it to put small pieces onto things to help maintain shapes.
Refer to the original drawing when making the eye holes so they are in the place you want them. Making 4 very tiny balls out of the black clay you will then use the tip of a needle to insert them into the holes you made. This takes time and is a delicate procedure. You want to try and not disturb the smooth surface of the head while attaching eyes. In this particular sculpture I wanted the eyes to be embedded into the head, so I made holes put in black clay and smoothed it out with a tool. Sometimes I want the eyes raised so I make much smaller holes in that case. It is really up to your preference.
Once the nose and eyes are complete and it should appear similar to the picture above; you're ready to start the feet!! For the feet take four pieces of clay in tiny pentagon shapes, then you just use the tip of the smoothing tool to shape them into webbed feet like a ducks. This will have three toes with webs in between.
Once you have attached all four feet you can begin to smooth them into the body and bottom of the platypus torso.
The complete and smooth bottom should appear like the above picture.
Now that you have them smoothed and all parts attached, I went in and indicated some arms in the front of the body and under the big feet. Here you see them complete, except for the wires and loops to hang them on the earrings findings by. These wires can be bought or for pictures of how to make them refer to my blog entry on How-To Make Koala Bear Earrings.
They are now complete and ready for a once over! They will not look perfect yet though because you will still need to bake them and then glaze them. Although at this point the hard part is over and you have a really cute and special pair of ear rings. In these next two pictures you will see the difference a little glaze makes. The Platypus earrings look much more finished and professional in the lower glazed pictures!!
In the above picture one can see how tiny the finished product is by sitting it next to a dime. This small size will help keep it lightweight and certainly makes it cuter!!
I am happy that Platypus won the contest because I had a lot of fun making these guys and I think they turned out cute!
Anything can be made if you have a good solid drawing and stick to it when sculpting. If it helps you can draw the earring designs from all different views to help you see what it should look like from the back as well as the front. The most important part of making ear rings out of polymer clay is to keep the design simple and keep your hands clean when moving from one color to the next! Take it easy until next time!
Don't forget to check out my etsy shop saucerfullofsecrets, to find cute earrings like these and other neat stuff!